Unfortunately, when my hard drive was formatted I lost all my work including the Media Composer project for the rough cut of Out of Date. This was extremely frustrating as I had worked very hard with it in the rough cut and was almost finished, so I spoke to our tutor Chris Hall and asked him if there was any way I could get the edit back or if I would have to start again. He advised I go on the last computer I was working on and go to its hard drive and click on the users folder, then shared, then AvidMediaComposer, and then find the folder called Avid Attic. Avid Attic autosaves a projects bins onto the computers hard drive even if you're working on an external project, which means that after looking on a few computers, I found a fairly recent copy of my project and located the rough cut sequence bin. Unfortunately, all the files were offline due to them being on the wiped hard drive so both myself and Chris tried every way we could to try and reconnect them. After a while we discovered that it wasn't easily possible, and Chris recommended that I just re-import the rushes and link up the timecodes of the offline files in the sequence, to the newly imported ones.
 |
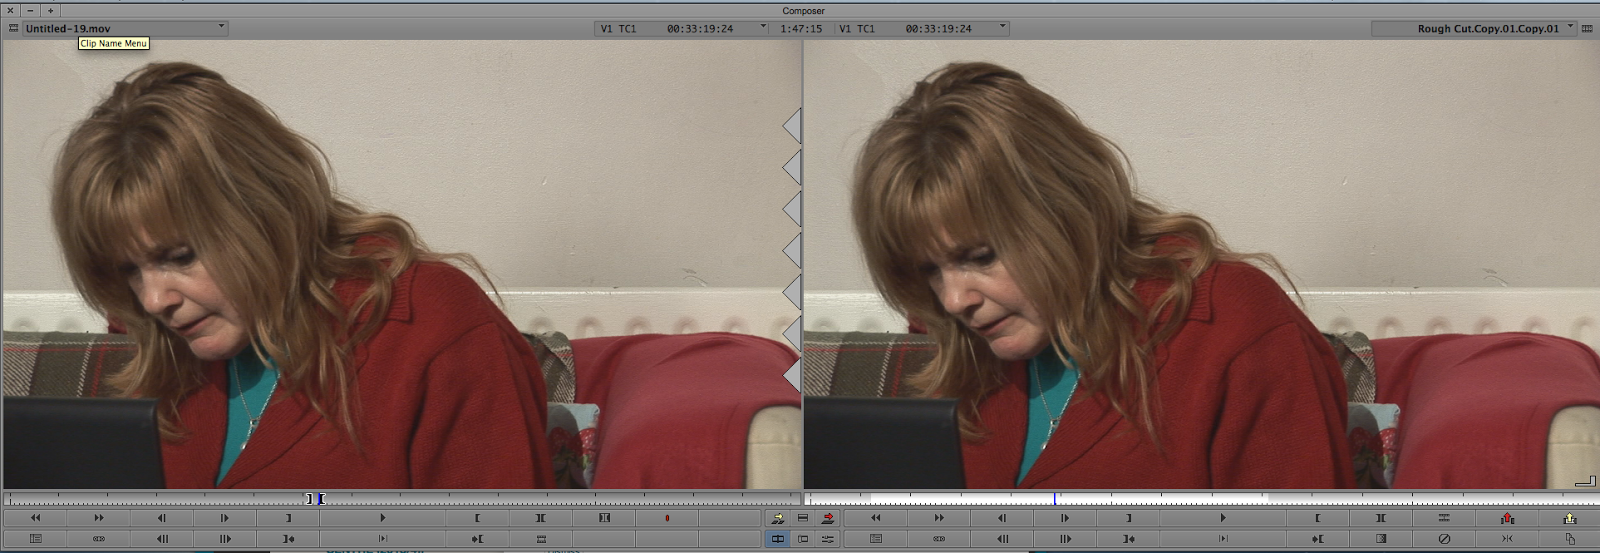
| Finding the timecodes and matching them up. |
|
 |
| Reconnecting the sequence. |
To do this I had to go to the start of the clip in the sequence and read the number at the top, in this case 00:33:19:24. I would then go to the newly imported rushes and using the display feature on the bin, locate the clip that contained that timecode in it. I would then put an in-point in at the matching timecode on the source view monitor, and then create and in-point and out-point around the offline clip in the sequence and then click the override button which would replace the offline clip with the online one.
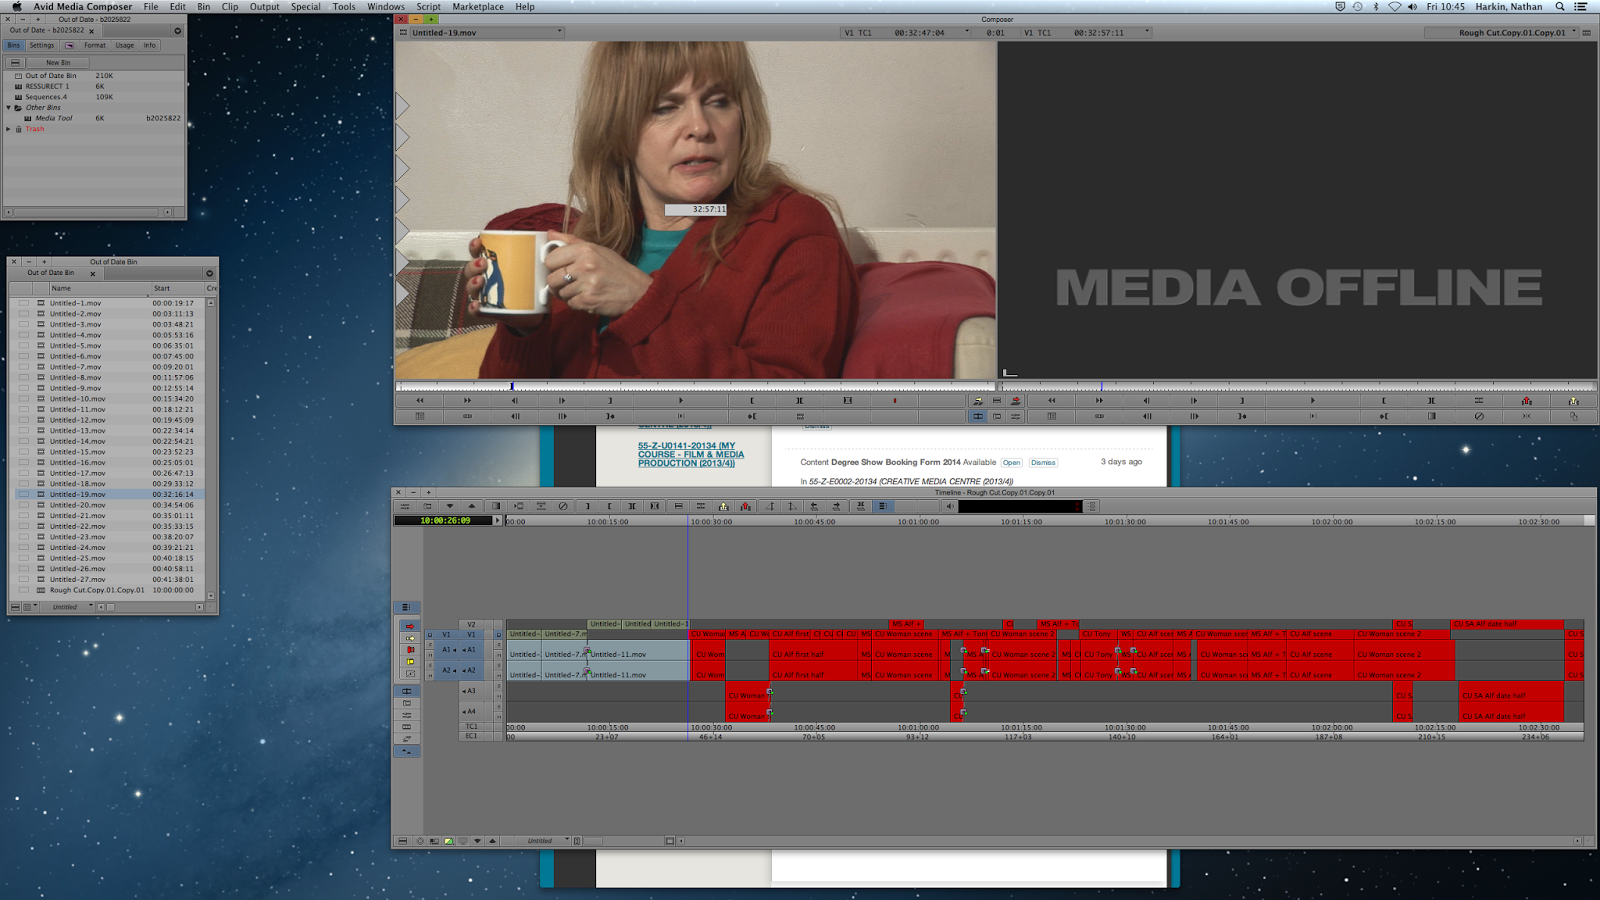 |
| Progression of reconnecting the sequence. |
This whole process was very precise and time consuming, but finally I managed to reconnect the whole sequence and could continue with the fine cut. It did set me back on the sound however, as any alterations I had made with the audio mixer had been undone, and some of the ADR/voiceover as well as plugging the audio with room sound, was impossible to link up using the timecodes when there was no video with it so I will have to do that all again.
However, after doing this and trimming the video slightly again just to tighten the edit a bit more, I was ready to start putting the finishing touches onto the sequence. I started out by adding in foley sounds to add more atmosphere and realism to the scene, as well as to show creative implementation of sound design.
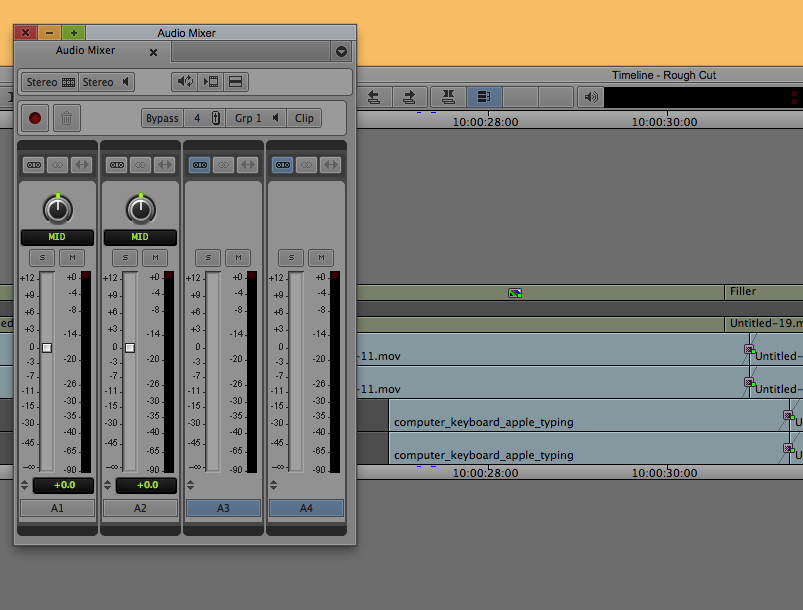 |
| Adding foley sounds. |
As these were recorded separately to the film and at different levels, I had to re-do the mix on them and the dialogue to make sure they weren't distracting from one another, but still have comedic effect.
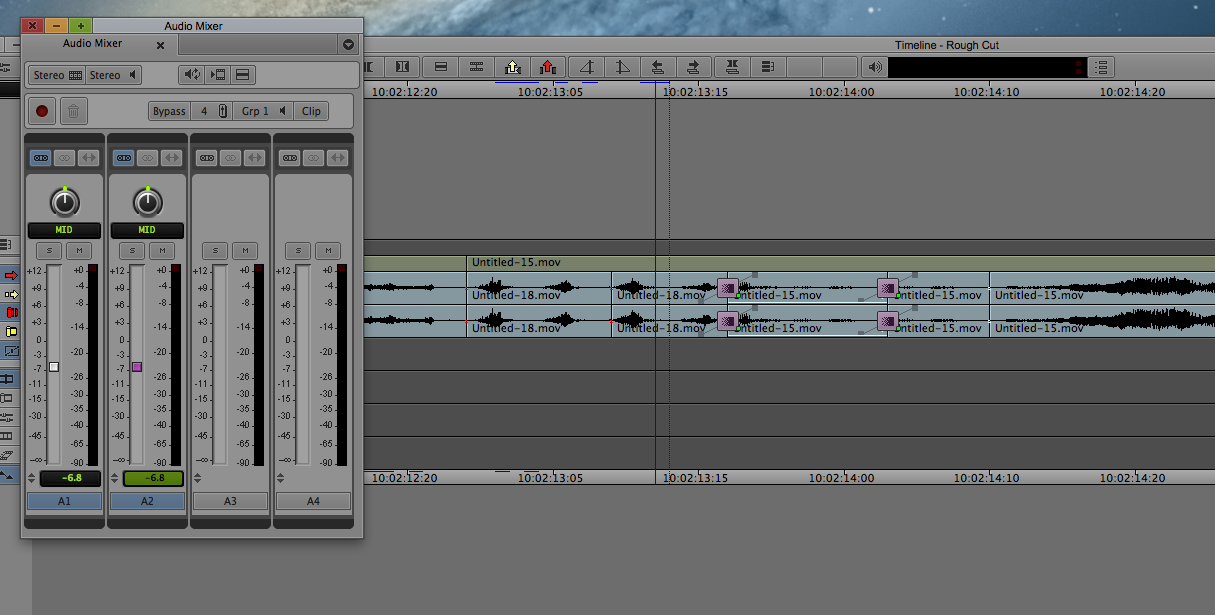 |
| Normalising audio to make scene flow smoothly. |
When I was happy with the audio, I started to put the final touch on the fine cut which was the colour correction. Originally I thought the colour was fine in the scene, and that the lighting for almost all the shots not only worked in terms of visual aesthetics, but also in terms of continuity with the previous shots. However, there were some slight visual discrepancies in the boldness of colours and the whites, so I decided to use the saturation and contrast options to normalise the images.
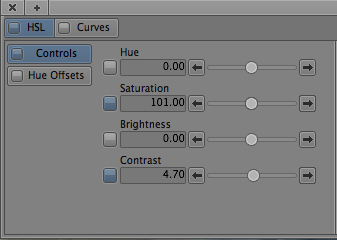 |
| Editing the saturation and contrast on specific shots. |
 |
| Subtle difference in colour grading. |
 |
| Progression of colour grading on sequence. |
As I only used around 4 or 5 different shots in the film, I used the FX template on the colour correction tool to keep the colour the same on each shot when it was cut back to along the sequence. I did this by simply dragging and dropping the FX template onto all the same shots along the timeline.
 |
| FX template. |
I looked over the whole film one more time to see if there was anything else that needed doing or stood out to me and after one or two small changes I had my final product.
 |
| The final fine cut sequence. |


No comments:
Post a Comment