Friday, 18 April 2014

Research Topic - Widescreen Format

Widescreen refers to the aspect ratio of a screen in film, television and on computer screens. In television, it took over from the standard definition format aspect ratio of 4:3 in the 2000's for better quality and HD (high definition) televisions (HDTV). 16:9 is the standard aspect ratio for widescreen at it refers to 16 rectangle units horizontal and 9 rectangle units vertical that make up a larger rectangle that is the area of the screen.
Source: http://upload.wikimedia.org/wikipedia/commons/7/72/16x9_by_Pengo.svg

Widescreen in film has been used since the late 1890's, starting with the film The Corbett-Fitzsimmons Fight (1897) by Enoch Rector, and has since been shot on a number of different sizes of film 63mm, 70mm and 35 Anamorphic. There are 5 main types of Widescreen formats for film:
  • Masked/Flat - Shot using spherical lenses but with the top and bottom of the frame masked by a metal aperture plate which was cut to the specifications of a theater's screen in the projector. The standard ratios for these are 1.66:1, 1.75:1, 1.85:1 and 2:1.
  • 35mm Anamorphic - A.k.a. CinemaScope or Panavision where the film is shot 'squeezed' and the projector has a special lens that projects it to make it look normal. The standard ratio for this is 2.40:1.
  • 70mm Anamorphic - same as 35mm but shot on 70mm film making the image quality higher, however has a high production cost so is rarely used. Standard ratio of 2.76:1.
  • Super Gauges - Filmed using a wider gate which records on the whole negative frame and is then shrunk to fit in the release prints. Aspect ratio can be shrunk to any standard.
  • Large Gauge - simply filmed on 70mm film which has four times the image area of 35mm film.

Thursday, 10 April 2014

Seminar 11 - Senna Analysis

This seminar was the last one before the Easter break so we began by discussing the semester and the module and if there was anything we wanted to know/needed help with before we broke up. We decided to review our blogs to begin with and get some formative feedback from Chris to help us progress them over the holiday. When we reviewed my blog, I was told that I had given numerous examples of film analysis and research, as well as other research on sound within film and reflection on my learning process. I also had adequately shown my editing process throughout the module on the different assignments but I could use a few more screenshots to make it clearer. The things I needed to improve on were theoretical research and evidence of that (In the Blink of an Eye) as well as addressing the set film in the module, Senna (2010) by Asif Kapadia. As this was the case in many peoples blogs, we decided to watch the first 30 minutes or so of Senna and write any notes up about the editing and the film in general. After the seminar I went home and watched the rest of the film and continued to analyse it.
First and foremost, the whole feature length documentary contains only archive footage of back when Senna was still alive, with a mixture of racing footage, television and interview footage, behind the scenes footage and family home video clips. The fact that these are used alone in a film of this length really allows the audience to feel immersed in that time period and not have any jarring cuts of archive footage into full HD quality footage. It makes the film flow a lot better and brings the audience back in time as if they were watching this story unfold as it happened. The use of just archive footage was definitely considered from the start of the production as there are more recent interviews with various figures in Senna's life and professionals of the motor industry at his time, that are used as voice over in the film with no talking heads like you would expect from a conventional documentary. This is once again to not ruin the immersion of the content of the film and pull back to other people so that the audience can focus on the one character that matters, that is Senna himself. This also allows the audience to feel a more personal connection with Senna as we see him in almost every clip in the film and he is discussed by all these different people.

This technique however, raises the issue of the audience not knowing who is giving the interview and how they are actually relevant to Senna's life, but a simple and effective work around of this that the documentary uses, is to bring up a on screen text of who the person is, and what their relation to Senna is. This can be argued as being quite dismissive of the persons importance to the story as they aren't important enough to be shown on screen, however as the narrative is focused on building up Senna as a person, it is used very effectively at keeping the audience informed and engaged on the main character, Senna.

Another major technique that is used very effectively in the narrative is focused heavily on the rivalry between Senna and Prost, making the film become more of a drama piece about the events occurring between the two over the course of their careers. The way in which this is done is partly through the selection of footage around the two and how the audience is lead to empathise with Senna over Prost through more footage of him being shown, both racing and in interviews, so the audience can get  more of a rounded perspective on him as a character whereas Prost's history isn't shown at all. This is to set up the narrative as a classic story of protagonist v.s. antagonist which builds up the drama and friction within the film, making it more enjoyable for the audience to engage with. It is constructed in a way that makes it an underdog story, with Senna being described climbing from racing go-kart's to becoming F1 Championship winner. This is much like the documentary brief we were given at the start of the semester, The Movement, as they both follow one persons goals and dreams while building empathy for them with the audience and representing them as passionate and iconic people in there respective fields.

Finally, the film is extremely efficient at building and releasing tension around the major plot points in the film through the use of both montage, and mostly, music. The use of music is very carefully considered as it is predominantly used with voiceover over close ups of senna or montages of him to build empathy for the character and to get into the mind of him so we can feel his emotions. However the music is almost always cut out when Senna is actually racing and is replaced by either just the sounds of the F1 cars by themselves over a brief montage of him driving, and then voice over is introduced from the more recent interviews of people talking about his driving technique or him as a person in general. This assertion is usually backed up by a clip that shows what was described, by him driving. An example of this is 12 minutes into the film when he is described by a voice over as being fast and that he pushed the car to its limits, then we see a clip of the car going around corners and wobbling dangerously as it appears to be struggling with the speed it is going. To go back to my previous point, when the music is used on a build up to a race, it normally builds pace or pitch to create a powerful tension, then crescendos by being sharply cut out and replaced with an loud engine sound of a car. As the audience knows that Senna dies in an F1 race, this technique constantly provides heavy tension then relief to the audience as they want his death to be prolonged as much as possible, due to the empathy towards him, built through a mixture of the techniques listed above.

Wednesday, 9 April 2014

Out of Date - Fine Cut

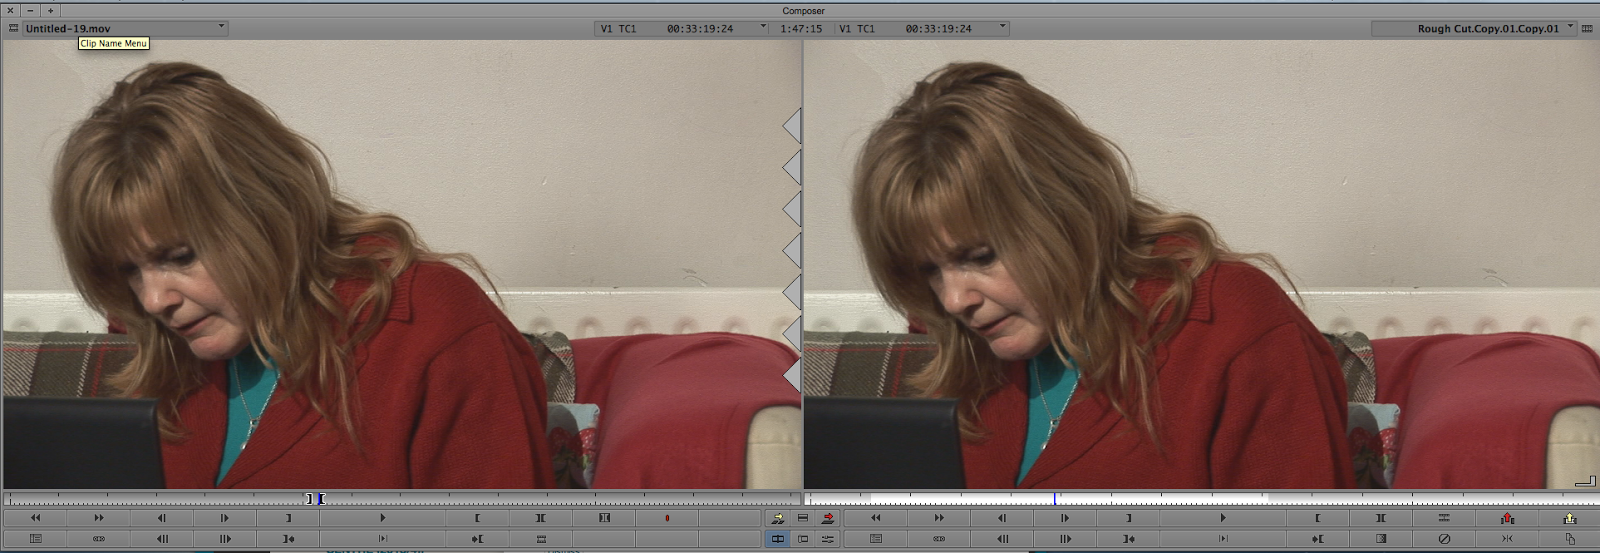
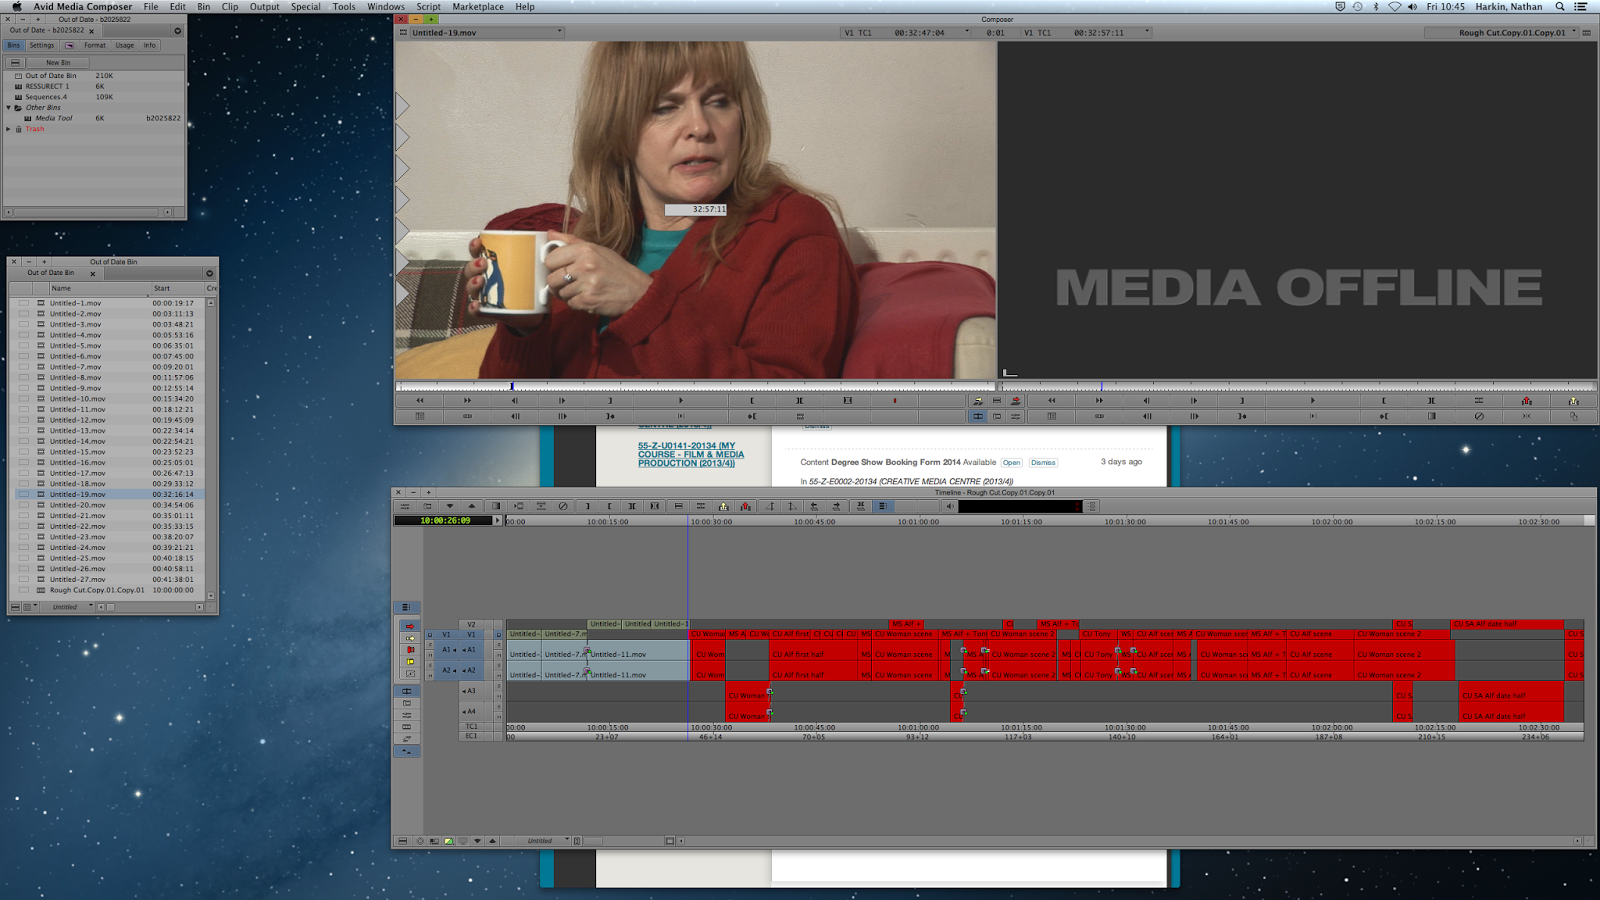
Unfortunately, when my hard drive was formatted I lost all my work including the Media Composer project for the rough cut of Out of Date. This was extremely frustrating as I had worked very hard with it in the rough cut and was almost finished, so I spoke to our tutor Chris Hall and asked him if there was any way I could get the edit back or if I would have to start again. He advised I go on the last computer I was working on and go to its hard drive and click on the users folder, then shared, then AvidMediaComposer, and then find the folder called Avid Attic. Avid Attic autosaves a projects bins onto the computers hard drive even if you're working on an external project, which means that after looking on a few computers, I found a fairly recent copy of my project and located the rough cut sequence bin. Unfortunately, all the files were offline due to them being on the wiped hard drive so both myself and Chris tried every way we could to try and reconnect them. After a while we discovered that it wasn't easily possible, and Chris recommended that I just re-import the rushes and link up the timecodes of the offline files in the sequence, to the newly imported ones.
Finding the timecodes and matching them up.
Reconnecting the sequence.
To do this I had to go to the start of the clip in the sequence and read the number at the top, in this case 00:33:19:24. I would then go to the newly imported rushes and using the display feature on the bin, locate the clip that contained that timecode in it. I would then put an in-point in at the matching timecode on the source view monitor, and then create and in-point and out-point around the offline clip in the sequence and then click the override button which would replace the offline clip with the online one.
Progression of reconnecting the sequence.
This whole process was very precise and time consuming, but finally I managed to reconnect the whole sequence and could continue with the fine cut. It did set me back on the sound however, as any alterations I had made with the audio mixer had been undone, and some of the ADR/voiceover as well as plugging the audio with room sound, was impossible to link up using the timecodes when there was no video with it so I will have to do that all again.

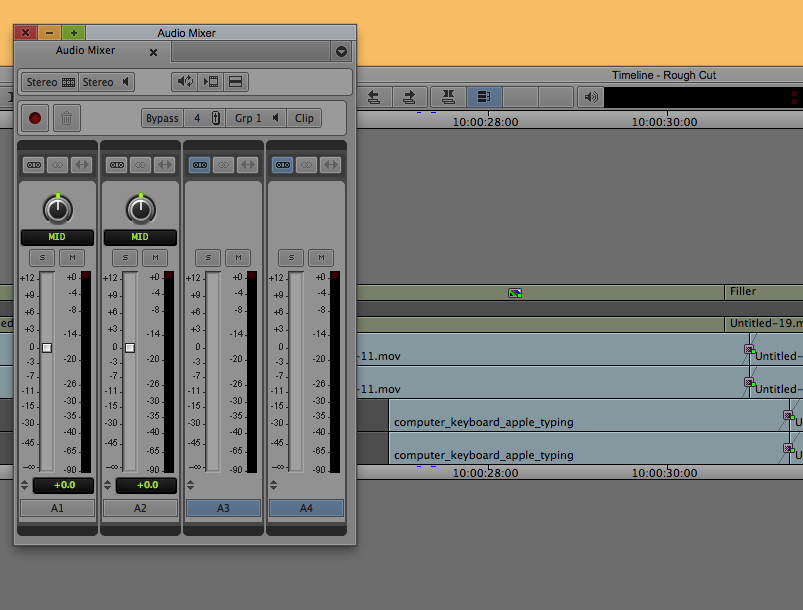
However, after doing this and trimming the video slightly again just to tighten the edit a bit more, I was ready to start putting the finishing touches onto the sequence. I started out by adding in foley sounds to add more atmosphere and realism to the scene, as well as to show creative implementation of sound design.
Adding foley sounds.
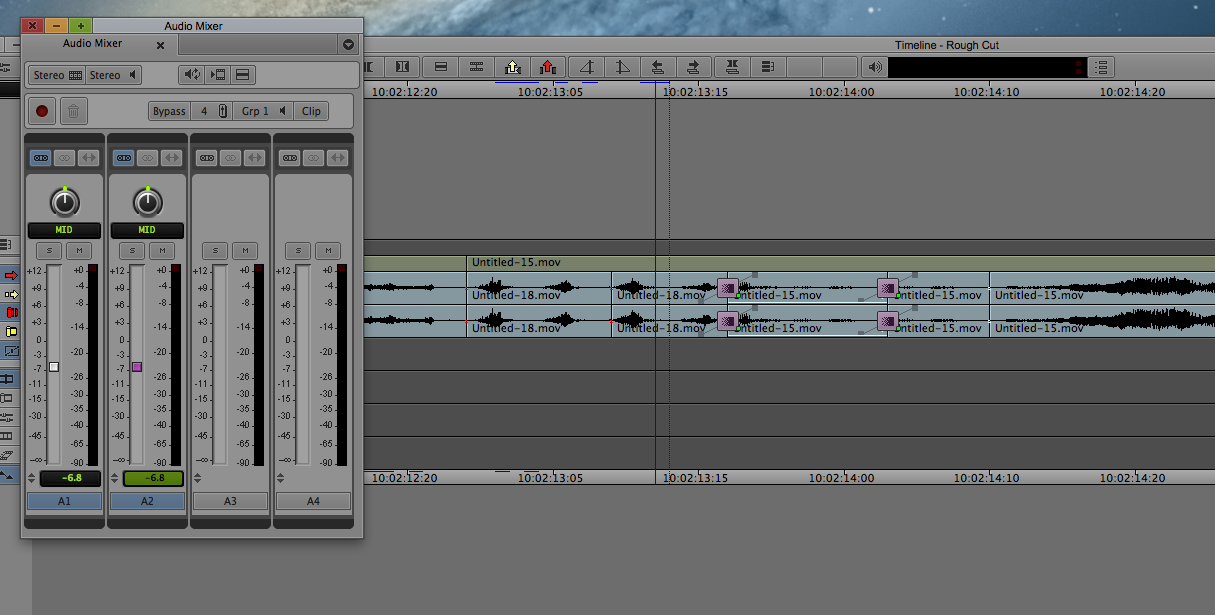
As these were recorded separately to the film and at different levels, I had to re-do the mix on them and the dialogue to make sure they weren't distracting from one another, but still have comedic effect.
Normalising audio to make scene flow smoothly.
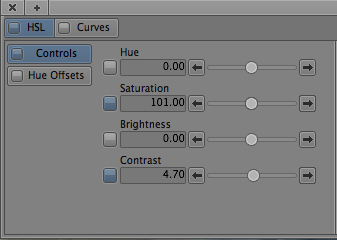
When I was happy with the audio, I started to put the final touch on the fine cut which was the colour correction. Originally I thought the colour was fine in the scene, and that the lighting for almost all the shots not only worked in terms of visual aesthetics, but also in terms of continuity with the previous shots. However, there were some slight visual discrepancies in the boldness of colours and the whites, so I decided to use the saturation and contrast options to normalise the images.
Editing the saturation and contrast on specific shots.
Subtle difference in colour grading.
Progression of colour grading on sequence.
As I only used around 4 or 5 different shots in the film, I used the FX template on the colour correction tool to keep the colour the same on each shot when it was cut back to along the sequence. I did this by simply dragging and dropping the FX template onto all the same shots along the timeline.
FX template.
I looked over the whole film one more time to see if there was anything else that needed doing or stood out to me and after one or two small changes I had my final product.
The final fine cut sequence.

Monday, 7 April 2014

Hard Drive Issues

This week I got a new hard drive to accommodate the edit I was doing my drama film in the narrative strand of the project and so I needed to format it to exFat in order for it to work on both Mac computers and PC's. Unfortunately I had my old hard drive still plugged in when I chose to format the new one, and I accidentally formatted both the old and the new hard drives at the same time. This meant that all 900+gb of work I had on the old drive was instantly wiped, including all my post production work from this semester. I attempted to recover my files by downloading software that would help me do this but after 2 days of reading and recovering the files, it only fully recovered around 1000 files most of which were small and useless hidden files, and partly recovered 3000 more out of a possible 140,000+ that were present on the drive.
Attempting to recover lost files.

This meant that I was very unlikely to have recovered any important or useful files that would help me get back on track with the work I was half way through on Out of Date. It also means that I have lost both my Media Composer project files for The Movement and Night Journey, meaning that I cannot re-edit them at all and will have to submit the fine cuts we presented in class over the past 2 months.
Although this has been a major set back for me as I have also lost all my screenshots of the assembly and rough cut of the Out of Date project, as well as any others from seminars and past projects, I have arranged to meet with the tutor Chris to see if there is any way we can recover these files and get the ball rolling again so I don't have too much of a massive workload to complete by the end of the semester. As the formatting of the hard drive was completely my fault, I will be staying in university over the Easter holiday to catch up on my lost work so I can still submit professional standard films and obtain a good mark.

Friday, 4 April 2014

Wolf of Wall Street Analysis

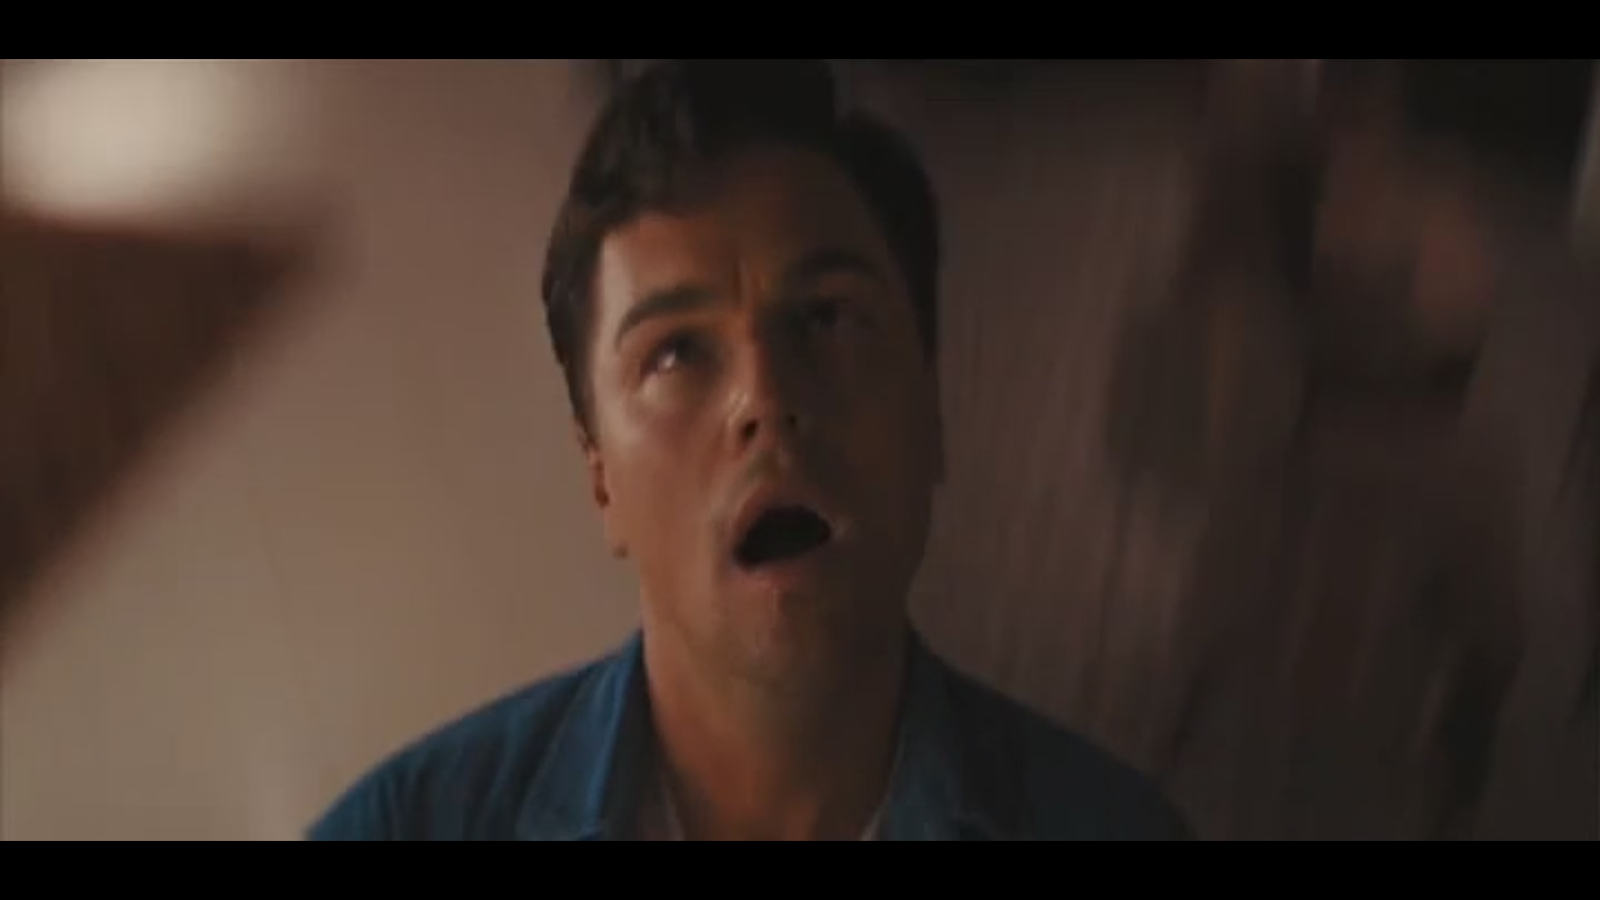
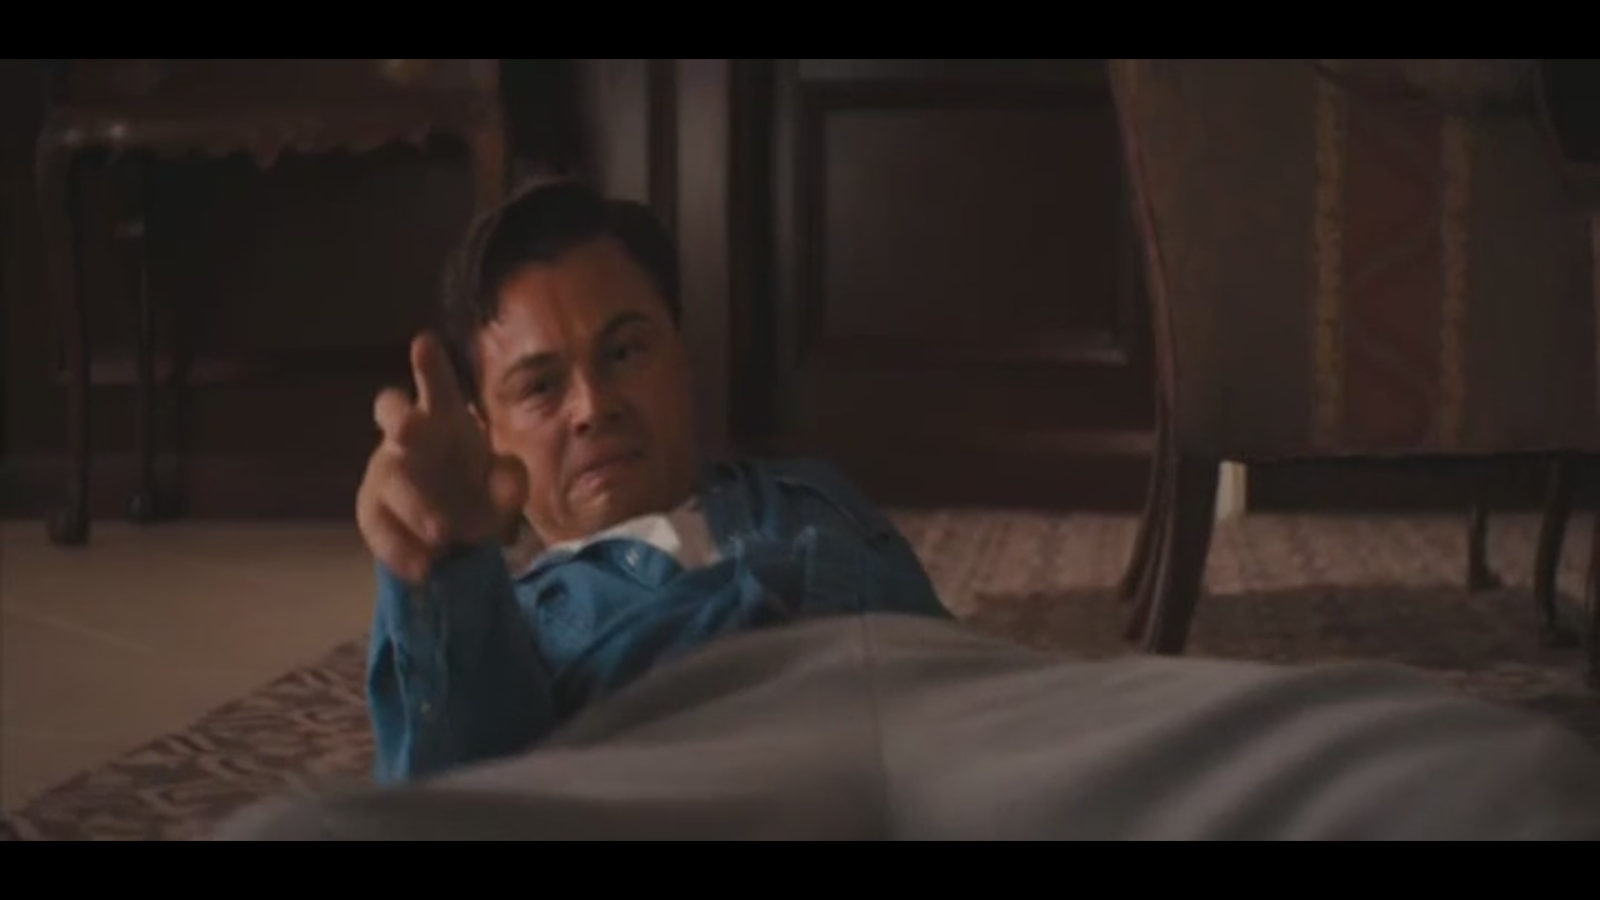
The scene I have chosen to analyse in Martin Scorsese's 'The Wolf of Wall Street' (2013), is around 1 hour and 58 minutes into the film where the main character, Jordan, has just taken a large amount of drugs (Quaaludes) and is attempting to rush home to get his work colleague, Donnie, off the phone as he has just been informed that the FBI are tapping it.
The whole of this scene is centred around the performance that Leonardo DiCaprio, Jordan, gives showing the effect and impact of these drugs. The reason I have chosen to analyse this scene is because it uses a variety of different techniques effectively to tell the story as well as keeping the audience entertained and engaged with it.
Firstly, we see the effect the ludes start to take on Jordan as he is on the phone which uses a mixture of static mid shots, extreme close ups, GoPro style mounted shots as well as dolly zooms. All these camera angles would normally be considered over the top and unnecessary, but here they are cut in with one another as a visual way of showing what effect the drugs are having and the confusion it is causing Jordan.
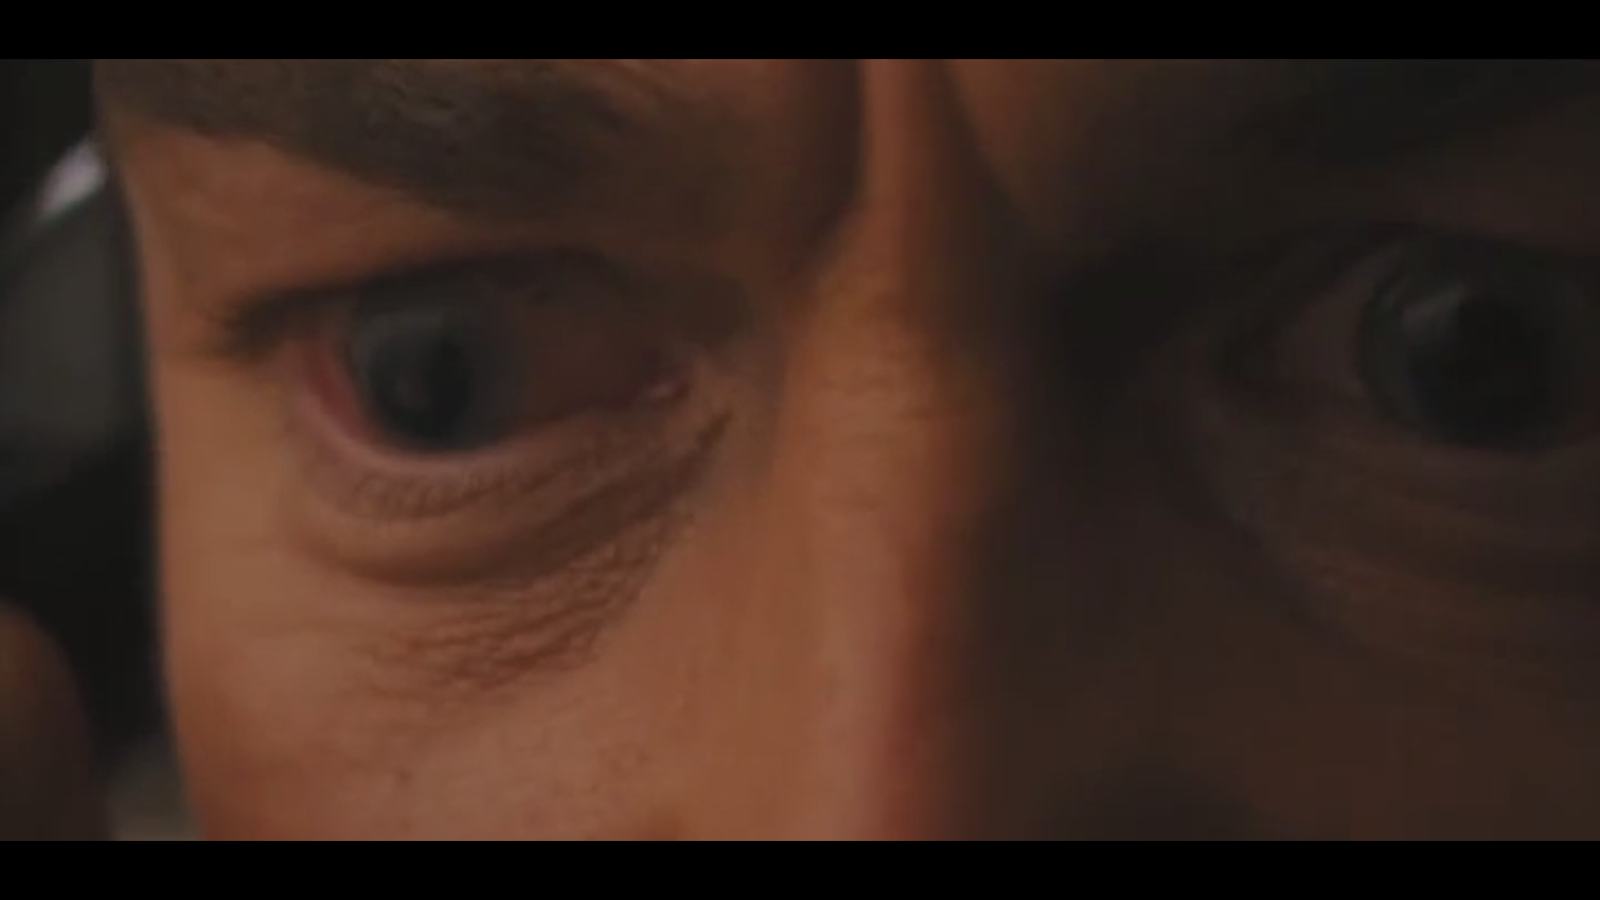
Extreme close up to make the audience feel as though they are in his head experiencing it with him.
Body mounted shot used for the same reason as the XCU.
Dolly zoom used to mimic effect of drugs.
All of these camera movements are accompanied by a voice over of Jordan explaining what is happening to him and what he feels like so the audience can still understand what's actually going on. Its also used because Jordan can no longer talk due to the Ludes, and instead we get a internal running monologue from him so the narrative can keep progressing. This technique could be seen as a lazy story telling device as the audience is basically being spoon-fed the narrative by the use of the voice over, however, as this scene is so centred on the performance of DiCaprio, it makes it more comical that we are being told what is going on in his head and him struggling to do anything about it.

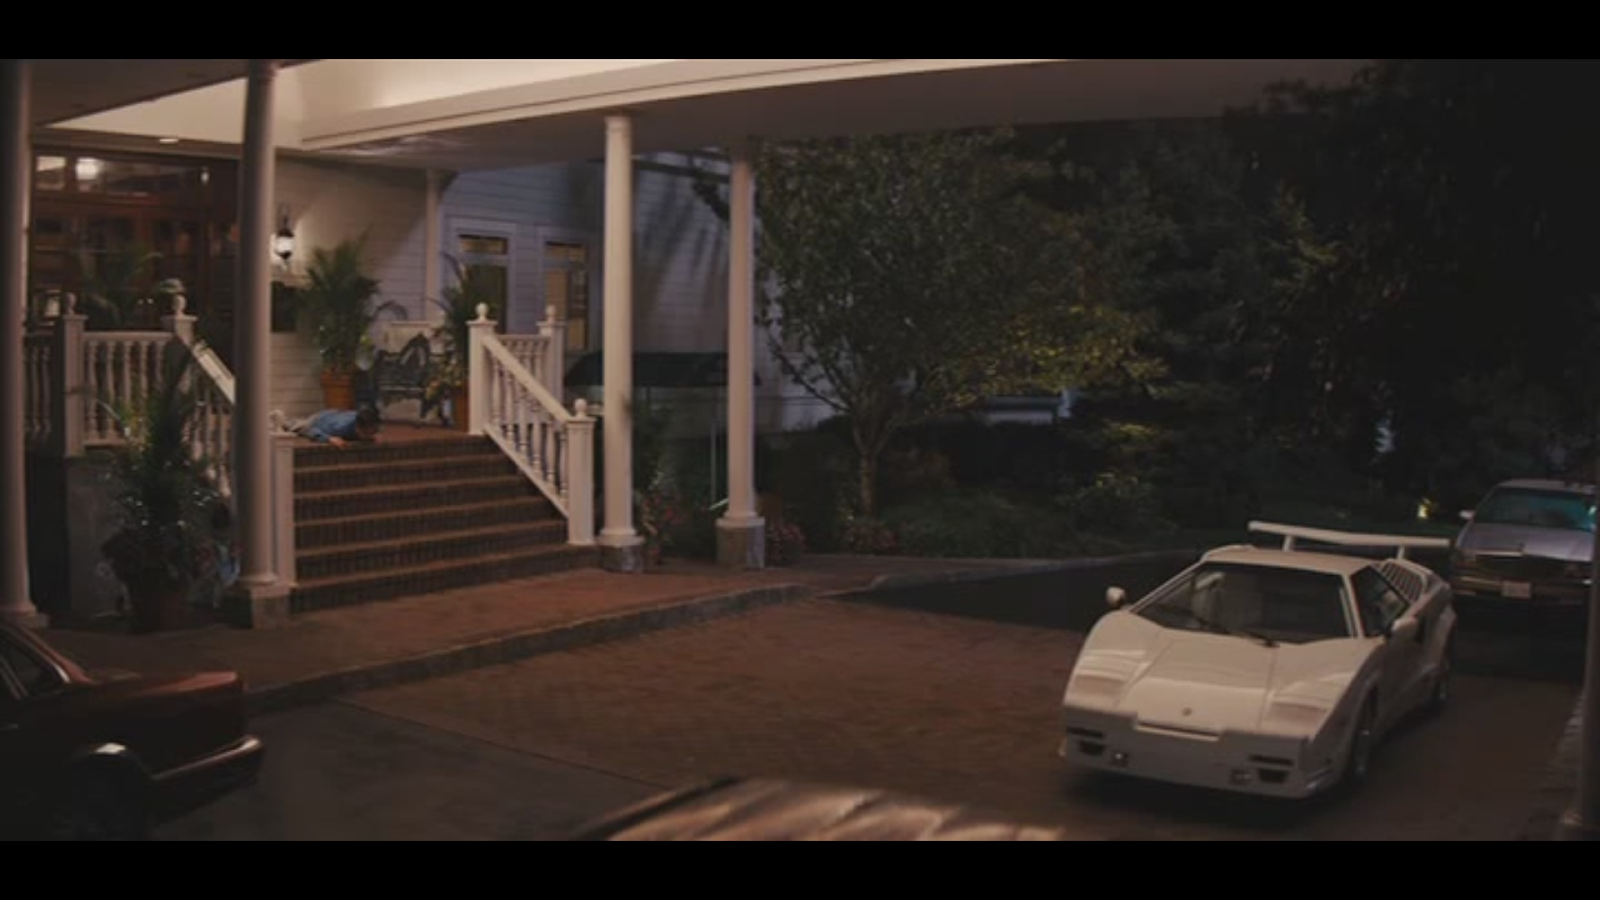
The next section of the scene is when Jordan is attempting to get in his car and him arriving at his house which starts off with a series of wide shots after a close up of his face.
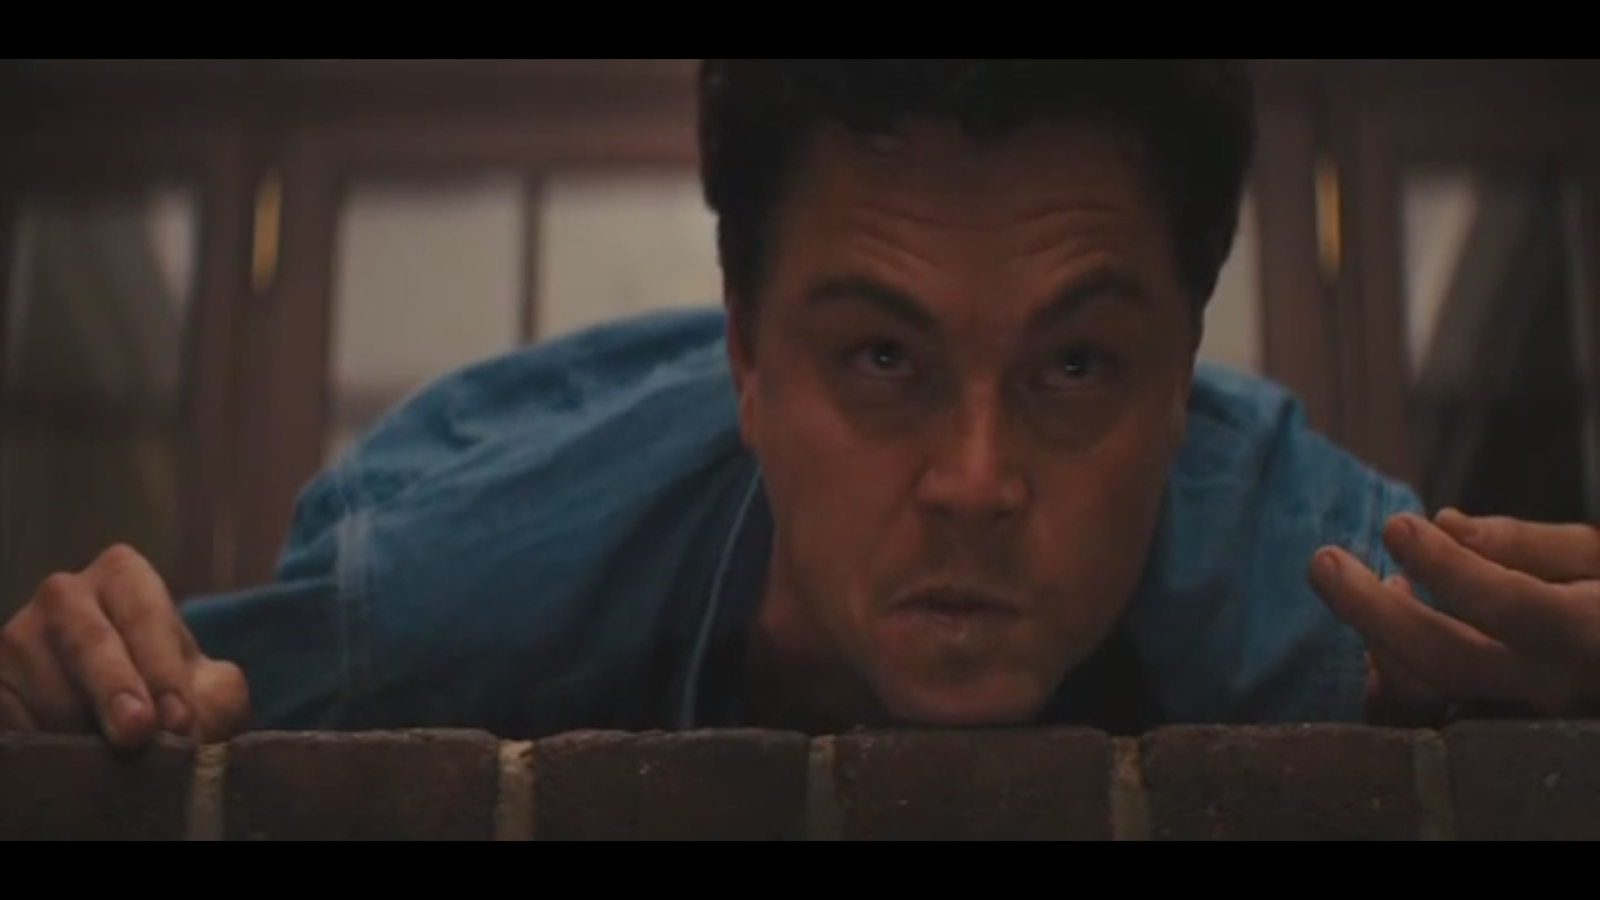
Close up to establish eyeline and reaction.
Wide to establish location and show distance for comical effect.
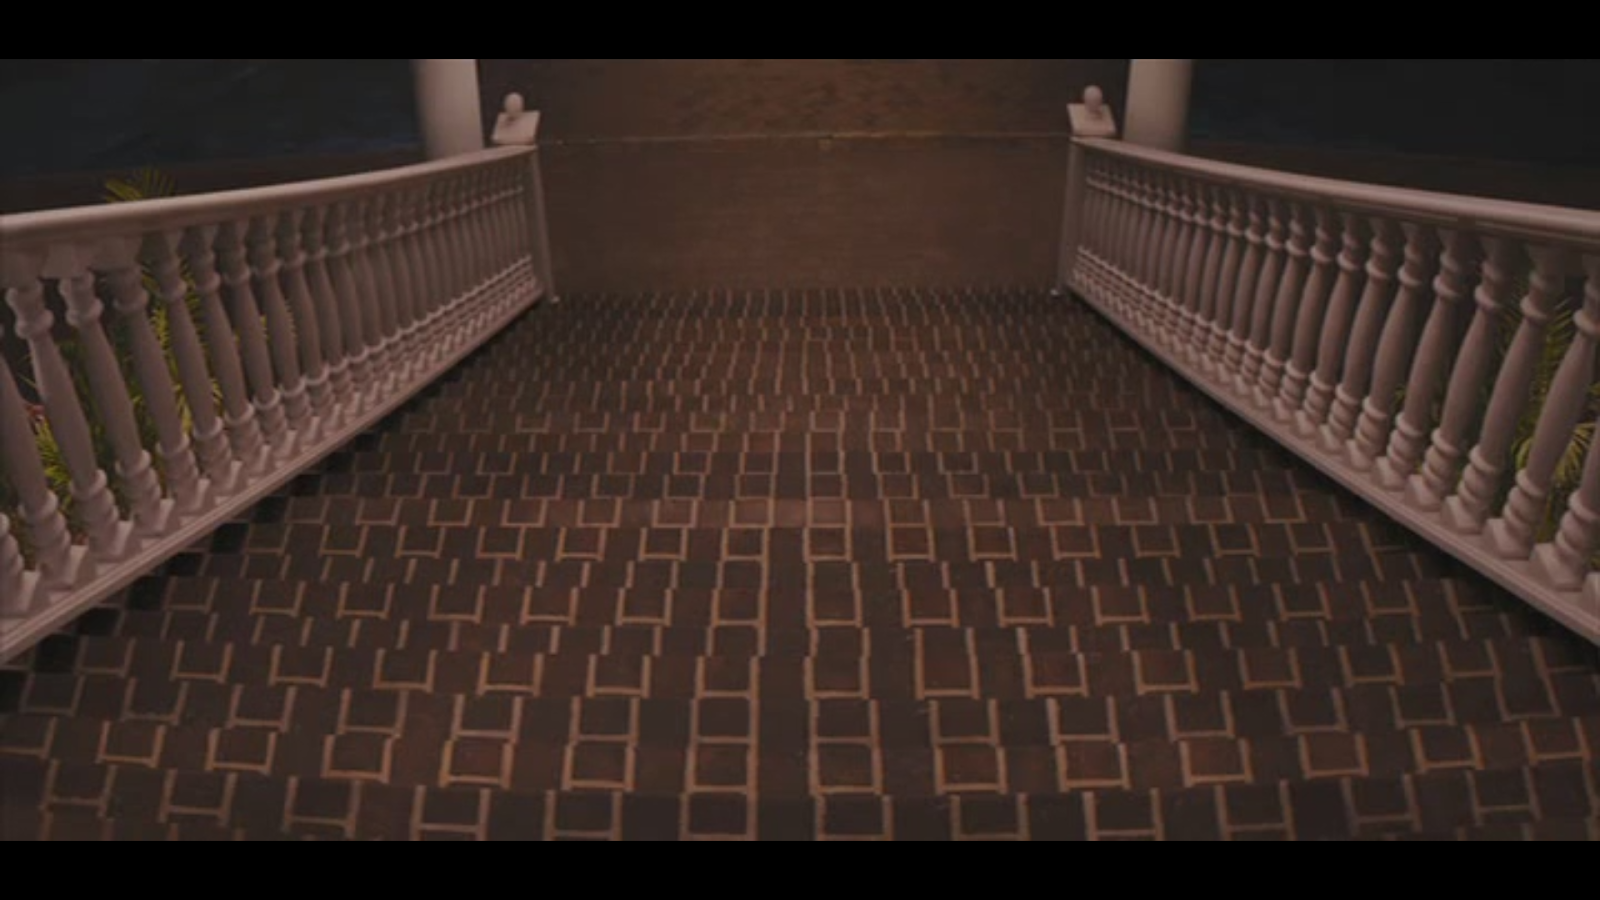
1st person POV shot to empathise with Jordan and get into his perspective.
This sequence is mainly built up of wide's for comic effect to show the distance between Jordan and his car (where he wants to be). It is really well cut from showing these wide's and mixing them with cut backs to his reaction and performance as a whole. It contains a long take within the sequence which is once again used for comic effect to see the extent in which the Ludes have effected Jordan through the physical performance DiCaprio gives.

Finally, when Jordan actually gets in his car and drives home, there as a lot of different cuts to other characters who are relevant to the scene. Scorsese uses this technique of limiting the voice over to just Jordan and his internal monologue a great deal within the film and then cuts to the other people that are relevant in the scene, to allow the audience to establish who is speaking. This is done mainly when people are speaking with one another on the phone like in the previous scene.
Cutting between characters and locations.
Cutting back to action to establish internal monologue as the voiceover.
Another reason why I believe this is used within this scene specifically is to distort the perception of time, as well as not allowing the audience to really see what is going on in the main interest in the scene, Jordan driving his car, to save it for a reveal later on for a bigger pay off.

This film is relevant to both the comedy edit brief and the previous project of Night Journey. The focus on the performance over anything else is what I will be attempting to do in the Out of Date edit as it is the most important aspect of any comedy film. The use of voice over in this film is relevant to the Night Journey brief, as it has taught me that you need to establish who's voice over it is and why it is being used.
Thursday, 3 April 2014

Seminar 10

This seminar was used as a catch up session and overview of our whole learning process over the semester. We started by doing a group exercise of writing down 100 things about editing that we had learnt in the previous seminars and through our further reading. As there were only 5 of us in the seminar this task proved to be quite difficult and took quite some time to complete, but when we did there was a lot of subjects that I had personally overlooked and forgotten about and it gave me a chance to remind myself of them and their relevance to editing and my own learning.
The finished list we created of 100 things about editing.
This task was useful in the sense that it reminded me of things that we were taught about at the start of the year which I had subsequently forgotten, which I could use to either put here on my blog, or apply to my Out of Date cut I was doing to make it a professional piece. A lot of the things that were put on the list reflected the analysis we had done as a group in seminars on select films chosen by our tutor. My blog already reflects quite heavily and consistently on these so I had could easily relate and talk about them, however, the part I was contributing the least on was the theory and further reading side. This then made me reflect on my blog and my learning and gave me a goal as to what I needed to do to progress to a higher level of understanding in regards to editing, and I will attempt to execute this before the module is over to help my make the transition to the final year as smooth as possible.

After discussing this task, we went onto talk about useful things we may need to know when completing our Out of Date fine cuts for next week. We started off by talking about colour grading and how to do it effectively to only over or under-exposed parts of a shot. To do this you use the spot colour correction effect and using the shape tool, create a region that you want to change, then adjust either the colour or the contrast depending on what effect you want to achieve. We also learnt that you can simply drag the colour correction icon, when in colour correct mode, over any clip in the sequence to get the same effect throughout which is particularly relevant to the scene I have chosen, as it all takes place in the same location with only around 4-5 different shots, so I can keep the colour grading constant throughout the scene with no or little fluctuation.

Wednesday, 2 April 2014

Out of Date - Rough Cut

The main issues with my assembly for Out of Date were the pacing and sound. To progress into the fine cut stage I addressed these with the most attention and precision by starting to trim the video down and make the shots run more smoothly together to make the scene more pleasing to watch.
Trimming frames inbetween shots to make them flow more smoothly.
Cutting out beginning and ends of shots for a tighter edit.
The next issue I addressed was the sound and there was a fairly large amount to do on it. The main issue I had was that there was a lot of overlapping dialogue between characters on different takes which meant that holding shots and reaction shots after a line had been said for comedic timing, caused gaps in the audio to become obvious and make these reaction shots seem out of place and awkward.
Trimming overlapping audio.
Lifting audio out, before.
Lifting audio out, after.

Like I said, this left me with some gaps in the audio which didn't fit, so I got around this by plugging the gaps with other audio from either the other shot, or if that audio wasn't usable, then just using the room tone, or gasps or reactions from other parts in the scene.
Plugging audio gaps with room tone, before.
Plugging audio gaps with room tone, after.
Using ADR or different audio for voice over to plug audio gaps.
I used ADR to get clearer recordings of the characters that the mic not pointing at them when using a different shot so I didn't have to constantly have it changing from one person to another when characters had quick intertwining lines with one another.
Finally, when doing audio plugging and changing from one audio file to another, there can be a noticeable and distracting popping sound. To get around this I applied small 4 frame audio transitions to smooth over these audio changes to make them sound more crisp and less noticeable to the audience.
Audio transitions.
The rough cut has been a lot of work especially on the sound, but now I am ready to progress to the fine cut stage where I will tighten up the visual edit frame by frame as well as make the audio smooth and consistent to create a solid final product.